File Upload
The File Upload node injects local files into an <input type="file"> element for automated file upload.
Overview
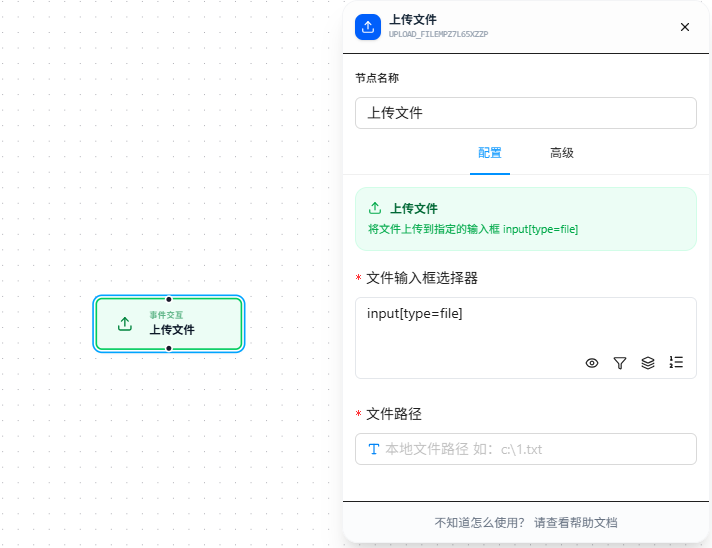
Uploads files to an <input type="file"> element. Supports local files and remote files (URL).
File access permission must be enabled in extension management before use.
File paths support {{variableName}} references; see Variables.
Quick Start
- Drag the "File Upload" node onto the canvas
- Fill in "File Input Selector" CSS selector (required), pointing to the target
<input type="file"> - Fill in "File Path": for local files, use an absolute path (e.g.,
C:\data\report.pdf); for remote files, use a URL (e.g.,https://example.com/file.pdf) - Execute
FAQ
File path inaccessible error on upload
- Open the browser's extension management page, find this extension, and click "Details"
- Enable the "Allow access to file URLs" option
- Confirm the path provided is a local absolute path (e.g.,
C:\Users\Username\Documents\file.pdf), not a relative path, and that the file actually exists - If using a remote file, confirm the URL is complete and directly accessible in the browser — the file should be downloadable